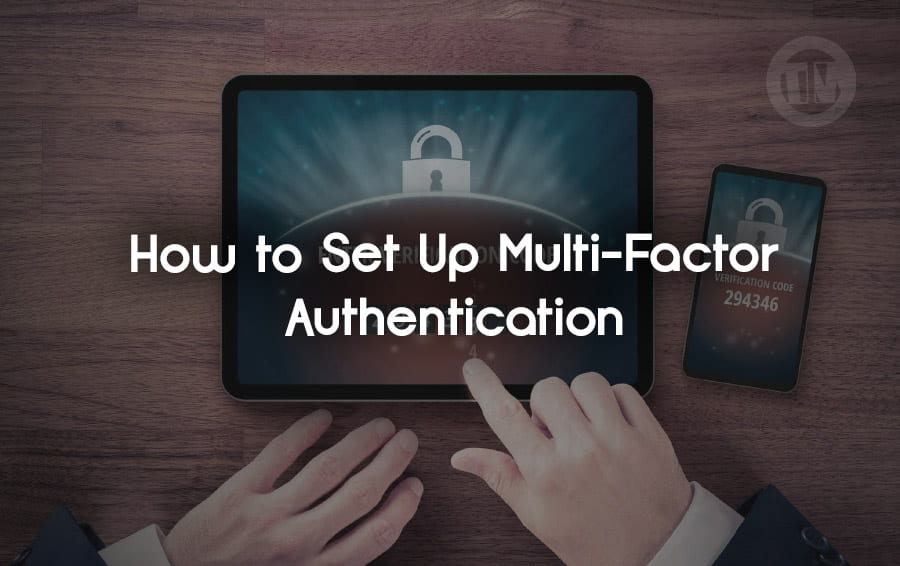
In the simplest terms, Multi-Factor Authentication (MFA) is an extra layer of security designed to ensure that you’re really who you say you are when logging into an online account. You’ve probably used passwords to log into your accounts for years, but what happens if someone gets a hold of that password?
This is where MFA steps in, making it much harder for hackers to gain unauthorized access to your stuff.
With MFA, it’s not just about the password anymore, it’s about having more than one way to confirm your identity. Normally, you’ll have something you know (like a password) and something you have (like your phone to receive a code, or an authenticator app that generates a time-sensitive code).
Sometimes, there’s even something you are—like your fingerprint or face recognition.
For example, let’s say you’re logging into your email account. After entering your password, instead of being immediately granted access, you’ll get prompted for a second verification step—like a code sent to your phone, or a prompt from an authentication app.
This ensures that even if someone else knows your password, they still can’t get in without that extra verification step.
This added security step drastically reduces the chances of hackers breaking into your accounts because now, they’d need more than just your password to get in. MFA adds an additional layer of protection, making sure your personal and sensitive data stays in your hands.
How to Set Up Multi-Factor Authentication on Every Account
1. Apple Two-Factor Authentication
If you’re an Apple user, whether on iPhone, iPad, or Mac, you probably know how essential your Apple ID is. It’s not just a login to the App Store, but also a gateway to iCloud, iMessages, FaceTime, Apple Music, Apple TV+, and basically all the fun and useful things Apple has to offer.
That’s why securing your Apple ID with Two-Factor Authentication (2FA) is a no-brainer.
So, how do you set it up? It’s actually pretty easy. Here’s how:
- Go to Settings on iPhone/iPad
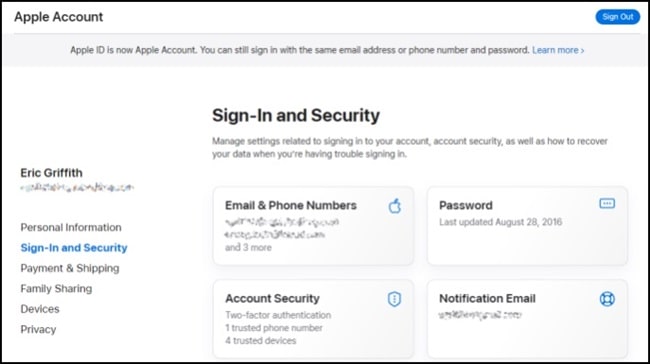
Open up your iOS device and head over to Settings. Tap on your name at the top, then scroll down to Password & Security.
From there, you’ll see the option to turn on Two-Factor Authentication. - On a Mac?
If you’re on macOS, open System Preferences and click on iCloud. After signing in, click Account Details, then Security, and finally, turn on Two-Factor Authentication.
You’ll be asked to confirm your identity by answering some of your security questions and verifying your credit card details. After that, you’ll need to enter a phone number.
Apple will send a verification code to the number you’ve entered—yes, even if it’s the same number on your phone! The good news is that if you’re using the same device to set it up, the six-digit code will automatically pop up, saving you a step.
From then on, every time you sign into anything with your Apple ID, a code will be sent to your trusted device, and all you need to do is enter that code. It’s like having an extra layer of protection around your digital life, and honestly, it only takes a minute to set up!
Apple also supports app-specific passwords, physical security keys, and passkeys as additional security options, making it one of the most secure ecosystems around.
2. Facebook (Meta) Two-Factor Authentication
Facebook is one of those accounts you definitely don’t want to lose control of. After all, it’s more than just a social network—it’s your photo album, your business page, your marketplace hub, and sometimes, even your communication lifeline.
That’s why setting up Two-Factor Authentication (2FA) on Facebook is an absolute must.
Here’s how to do it:
- Go to Settings & Privacy
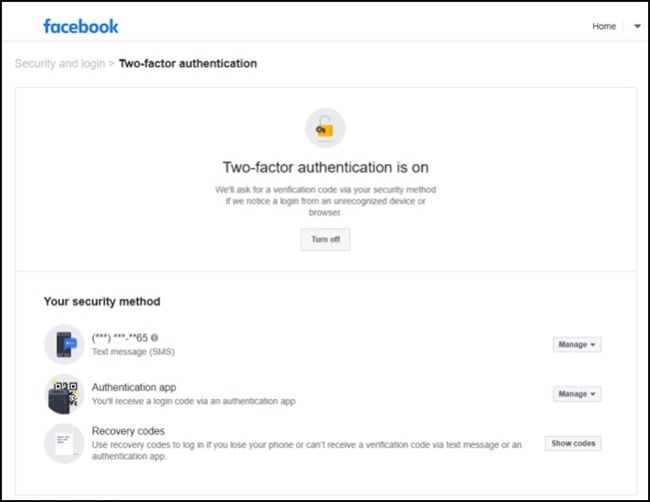
Open Facebook in your browser and click the down arrow at the top right of the screen. From the dropdown, select Settings & Privacy, then Settings. - Find Two-Factor Authentication
From the left sidebar, go to Security and Login and scroll down until you see Two-Factor Authentication. Click Edit next to it. - Choose Your Authentication Method
You’ll be given a few options for how you want to receive your second authentication factor:- Authenticator App:
This is probably the most secure method. You’ll be given a QR code on the screen that you scan with your phone’s authentication app, like Google Authenticator or Authy. - Text Message:
If you prefer, you can opt for a simple text message to receive your six-digit code. - Security Key:
If you have a physical security key (like a Yubikey), you can plug it into your computer when prompted.
- Authenticator App:
If you choose the Authenticator App option (which we recommend), Facebook will display a QR code on your desktop or mobile screen. Open the authenticator app on your phone, select Add Account, and scan the code.
That’s it! When you next log in, just open your authenticator app, find the code for Facebook, and enter it on the site.
Facebook gives you recovery codes in case you ever lose access to your phone or don’t have it handy. You can find these in the Additional Methods section of the Two-Factor Authentication settings.
Download and store these recovery codes in a safe place—you never know when you might need them.
With 2FA set up, Facebook will ask for that second code every time you log in, adding an extra layer of security. Trust me, it only takes a few minutes to set up, and it’s totally worth it to keep your account safe.
3. Instagram Two-Factor Authentication
Instagram, now owned by Facebook (Meta), has followed suit in making Two-Factor Authentication (2FA) a priority. If you’re an Instagram user, especially if you’re managing a business account or just don’t want your photos hacked, turning on 2FA is a must.
Here’s how to get started:
- Open Instagram Settings
Whether you’re using the mobile app or the desktop site, go to your profile and tap the hamburger menu (those three lines) at the top right. Scroll down and tap Settings. - Go to Security Settings
In the Settings menu, tap Security, and then Two-Factor Authentication. Instagram will give you two main options: Text Message or Authentication App. - Complete the Setup
Once you’ve chosen your preferred method, Instagram will walk you through the steps to confirm your phone number (if you’ve chosen text messages) or sync with your authenticator app.
If you want to stay safe, you can also download recovery codes in case you ever lose access to your phone or can’t get the code.
If you’re setting up 2FA on a device you don’t use much (like accessing Instagram from a desktop when you usually use your phone), Instagram will warn you to set it up on your primary device.
4. Google 2-Step Verification
Ah Google.. It’s pretty much the backbone of our digital lives right? We use Google for everything from checking emails in Gmail, storing photos and documents on Google Drive, shopping on Google Play, to accessing YouTube.
With all these services, you want to make sure that your account is locked down tight and that no one can access your personal information, especially your credit card details or sensitive emails. That’s where Google’s 2-Step Verification comes in.
Setting up Google’s 2-Step Verification is actually pretty simple, and it adds a layer of security that’s totally worth it. Here’s how to do it:
- Go to Your Google Account Settings
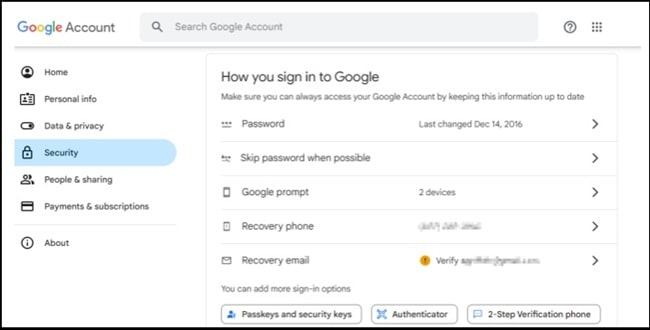
Start by opening your Google account. Head over to your browser and go to myaccount.google.com. Once you’re logged in, click on Security on the left side of the screen. - Set Up 2-Step Verification
Under the Signing in to Google section, you’ll see an option for 2-Step Verification. Click on it, and Google will guide you through the setup process. - Choose Your Verification Method
Google gives you a few different ways to verify your identity, but the most common ones are:- Google Prompt
- Authenticator App
- Text Messages
- Backup Options and Recovery Codes
One of the best features of Google’s 2-Step Verification is that it gives you the option to add backup methods. You can choose an extra phone number or email address where Google can send you a recovery code if you lose access to your primary phone.
Google also generates a set of recovery codes that you can print out or save somewhere safe. These are super helpful if you ever find yourself locked out of your account for any reason.
Once everything’s set up, Google will ask for that second verification step each time you sign in. It’s one extra step, but it’s a small price to pay for keeping your account safe.
5. Microsoft Two-Step Verification
Last but not least, let’s talk about Microsoft. From Outlook.com to OneDrive, Xbox, and Skype, a Microsoft account is at the heart of a lot of services we use daily.
If you use a Microsoft account to access Windows or Xbox, then you know how important it is to keep your account secure. Luckily, Microsoft’s Two-Step Verification is pretty simple to set up and adds an extra layer of protection to your account.
Here’s how to enable Microsoft’s 2-Step Verification:
- Sign In to Your Microsoft Account
Start by going to the Microsoft account website and signing in with your Microsoft credentials. Once you’re in, click on Security from the menu. - Set Up Two-Step Verification
You’ll see a section titled Two-Step Verification under Advanced Security Options. Click on it, and Microsoft will walk you through the process.
It’ll ask you to verify your identity through one of your registered methods (email, phone, etc.). - Choose Your Authentication Method
Microsoft offers several ways to verify your identity when logging in, including:- Microsoft Authenticator App
- Phone Number or Email
- Windows Hello
- Security Key
- Backup Codes and Recovery Options
Microsoft makes sure you’re covered even if you lose access to your primary verification method. You can generate recovery codes (similar to Google’s) that you can save offline.
Microsoft also provides options to register multiple phone numbers and email addresses to ensure you can recover your account if something goes wrong. - Passwordless Sign-In
Microsoft is really pushing for a passwordless future, so you might also see an option to set up a passwordless account. This means you won’t need a password to log in anymore—just the Microsoft Authenticator app or a security key. It’s quick, secure, and super easy.
Once you’ve set everything up, Microsoft will require a second step to verify your identity every time you log in. While it may seem like an extra step, it’s a small price to pay for keeping your account safe, especially when you consider how much of your digital life is tied to Microsoft.
Conclusion
Now that you know how important Multi-Factor Authentication is, surely you want to secure your accounts, right?
Of course and it must be, because security is very important to prevent the worst possible things from happening. So, grab your gadget and immediately set MFA on your accounts.


