

Are you now getting an error message that makes absolutely no sense? Something like “Bootmgr is missing” or “Windows failed to start”? Your PC was working fine yesterday, and now it’s showing this error.
If so, there’s a good chance the problem is related to something called the BCD. The BCD is responsible for directing your system to the right place — where your Windows operating system is stored — so that everything starts up smoothly.
And if the BCD is corrupted, of course you’ll get an error message like the one you’re seeing now. And of course you need and can fix it yourself (with the help of my tutorial, of course).
What Is BCD in Windows?
Before going into the tutorial on rebuilding the BCD, I will first explain in simple terms what is meant by BCD — short for Boot Configuration Data.
In simple terms, BCD is like a map of your computer to Windows. It tells your system, contains important instructions about where your operating system is located, how to boot it, and what settings to apply when starting.
In the past — like in the Windows XP era — the similar BSD was a file called boot.ini, which handled this task. But since Windows Vista, Microsoft upgraded and BCD began to be used, which is more flexible, more modern, and works well on newer systems and technologies such as UEFI.
So why should you care about BCD?
Because if something goes wrong — say, during a failed Windows update, a problem with your hard drive, or even after installing new hardware — your system might forget how to boot into Windows. Imagine trying to get into your house, only to find that the door is gone—that’s what happens when the BCD is missing or corrupted.
Luckily, Windows includes a command-line tool called bootrec , which you can use to rebuild the BCD. Rebuilding the BCD is like giving your computer a new, correct map.
So yes, the BCD is an important system file, and you should know how to fix it. At least, if you’re having the problem you’re having now (which is why you’re looking for a way to rebuild the BCD).
How to Rebuild the BCD
Okay, now that you know what BCD is, I will explain how to rebuild BCD.
The first thing to do, you need to enter recovery mode. If you are using Windows 11, 10, or 8, the easiest way is through the Advanced Startup Options menu. You can usually do this by holding down the Shift key while clicking restart, or if your PC is already stuck, it may automatically boot to this menu after several failed startup attempts.
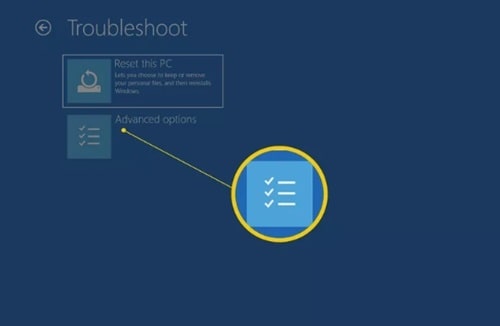
Once you’re in, click on Troubleshoot, then go into Advanced options.
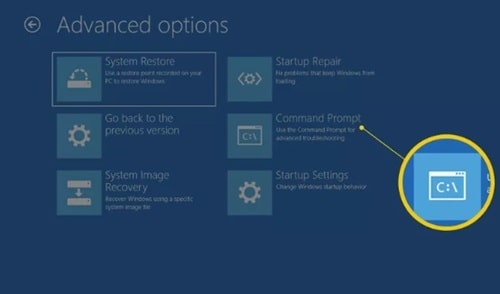
And from there, open Command Prompt. For those of you on Windows 7 or Vista, things are slightly different — you’re going to enter the System Recovery Options instead, but the rest of the process is mostly the same.
Now, with the Command Prompt open, it might ask for your account info — username and password. Go ahead and enter that.
Once you’re at the blinking cursor, type in this command exactly as shown..
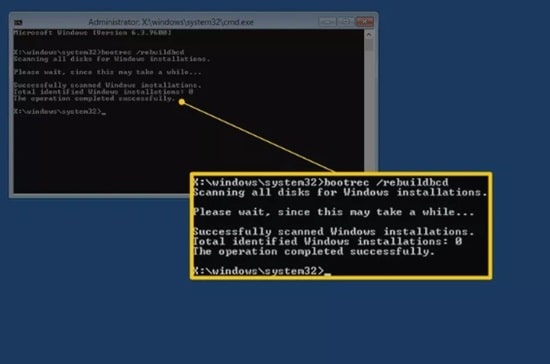
bootrec /rebuildbcd
Hit enter on keyboard.
At this point, your computer will start scanning all your connected drives, looking for any Windows installations that aren’t currently registered in the BCD. This part might take a little time, so just be patient and let it do its thing.
Now, you’ll see one of two results.
If it comes back with a message saying..
“Successfully scanned Windows installations.
Total identified Windows installations: 0”
So, it just means the BCD store exists, but the system didn’t find any other Windows installations to add to it. In this case, we’ll need to take a few extra steps to completely rebuild it from scratch.
But if you see something more promising, like..
“Total identified Windows installations: 1 [1] D:\Windows
Add installation to boot list? Yes/No/All:”
That’s good news, you can just type Y (or Yes) and hit enter on keyboard. Once you see the message that says “The operation completed successfully”, you’re basically done.
Your BCD has been rebuilt and your system should be good to go after a reboot.
Now, let’s say you’re in the first situation — where no installations were found. What we need to do is remove the existing (and probably corrupted) BCD file and let Windows build a new one from scratch.
First, you’ll export the current BCD file just in case you need a backup later. Type this command..
bcdedit /export c:\bcdbackup
Hit enter, and you should see “The operation completed successfully”. That means your BCD store has been saved as bcdbackup.
Next, we need to make the original BCD file editable. Right now, it’s locked with hidden, read-only, and system file attributes. So let’s strip those away with this command..
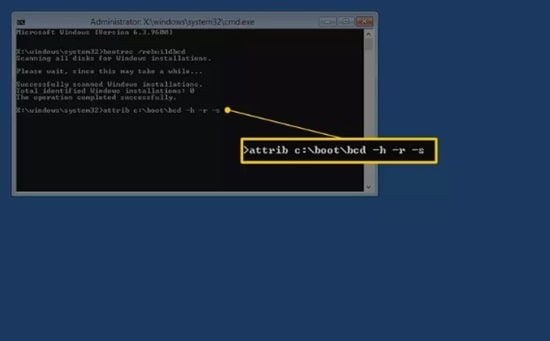
attrib c:\boot\bcd -h -r -s
Press enter again.
Now that it’s unlocked, rename the BCD file so Windows stops using it. Then use this command..
ren c:\boot\bcd bcd.old
At this point, the old BCD is out of the way, but we’ve still got your backup saved from earlier just in case.
Now, go ahead and try the rebuild command one more time..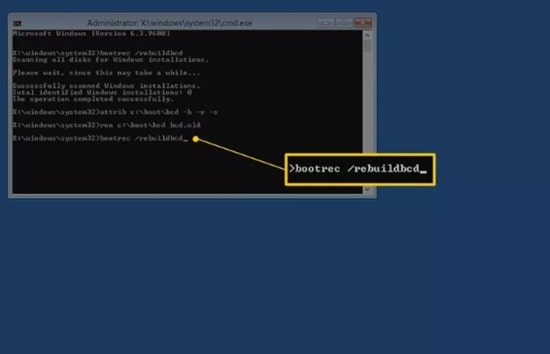
bootrec /rebuildbcd
This time, it should scan your drives again, and now it should definitely find your Windows installation. You’ll likely see something like..
“Total identified Windows installations: 1 [1] D:\Windows
Add installation to boot list? Yes/No/All:”
Type Y and press enter.

Once again, if you see “The operation completed successfully”, you’re good. Your BCD has been freshly rebuilt and your system now knows where Windows lives.
Now restart your PC, if everything went smoothly, Windows should boot up normally just like before. If you had used a USB drive or installation disc to access the recovery menu, don’t forget to remove it before restarting — just so your computer doesn’t try to boot from it again.
Now, if for some reason this still doesn’t fix the issue, there may be something else going on under the hood — like deeper corruption or a hardware issue — but rebuilding the BCD is one of the most solid first moves you can try, and it often does the trick.
Conclusion
What I can conclude is that if your Windows system refuses to boot, rebuilding the BCD is one of the effective ways that you can try. This method is also practical and can be done by anyone who is willing to type some commands and follow the steps as I mentioned.
So, the next time your system won’t boot and you are ready to pull your hair out, take a deep breath, grab your recovery drive (or installation media), and rebuild that BCD.


