Switching to a new Mac should be exciting, not stressful. New hardware, improved performance, and a new feel—sounds great, right? But then you remember all your files, apps, settings, and preferences, and that’s when people start worrying about losing their data.
In cases like that, you need Time Machine to address various data issues.
Time Machine isn’t just a backup tool—it’s like a digital safety net that secretly stores a copy of your Mac so you can restore everything when needed. Whether you’re upgrading to a new Mac or replacing an old one, Time Machine makes the transition smooth and incredibly easy.
Instead of manually copying folders, reinstalling apps one by one, and reconfiguring settings, you can move almost everything at once. And best of all, Apple has built the right tool for the job right into macOS.
How to Restore from Time Machine to a New Mac
If you’re moving from an old Mac to a new one, using a Time Machine backup is the easiest and safest way to transfer your data. It allows you to move files, user accounts, apps, system settings, and preferences—essentially making your new Mac feel instantly familiar.
Every new Mac comes with a built-in utility called Migration Assistant. This feature will take data from your old Mac, a Time Machine backup, or your startup disk and move it to your new Mac.
Even if you’re not familiar with it, Migration Assistant will walk you through everything step by step. But before you do, make sure you have a recent Time Machine backup of your old Mac.
If you’re not sure if your backup is up to date, take a few minutes to create a new one using the following steps..
- Plug your external hard drive into your old Mac
- Open System Preferences
- Click on Time Machine
- Choose Back Up Now
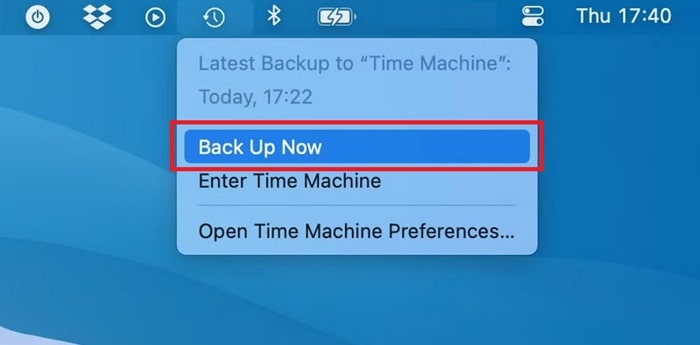
- Wait until the backup finishes completely
This final backup ensures that all your latest files, documents, and changes are included.
Setting Up Your New Mac with a Time Machine Backup
Once your backup is ready, you can move on to the new Mac.
- Connect your Time Machine backup drive to the new Mac
- Power on the new Mac
If your Mac hasn’t been set up yet, macOS will guide you through the setup process. During setup, you’ll be asked if you want to transfer information from another source.
Simply select the option to transfer data from a Time Machine backup, follow the on-screen instructions, and choose the backup you want to use. In most cases, the most recent backup is the best choice—unless you specifically want to restore an older version.
The system will then begin copying your data, which, depending on how much data you have, can take some time. Once complete, your new Mac will open with a look and feel very similar to your old one.
If You Already Set Up New Mac
And if you’ve already completed the setup on your new Mac, you can still bring over your Time Machine backup. You don’t have to start over.
Here’s how..
- Open Migration Assistant on your new Mac (press Command + Space, then type “Migration Assistant”)
- Click Continue and allow apps to quit if asked
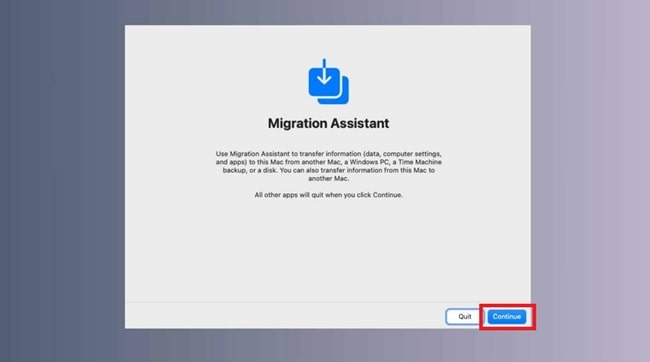
- Choose From a Mac, Time Machine Backup, or Startup Disk
- Select Time Machine as the source (make sure the backup drive is connected)
- Pick the backup you want to restore
- Start the migration and wait for it to finish
This process lets you copy files, user accounts, and settings onto an already configured Mac without wiping anything first.
How to Restore Your Mac from a Backup
Sometimes the problem isn’t about switching to a new Mac—it’s about fixing the Mac you already have. If your Mac starts to experience problems, such as frequent crashes or unexplained lag, restoring it to a previous point in time can be the best solution.
By returning to a backup created before the problem began, you essentially restore your Mac to a healthier state.
Restoring Using Recovery Mode
To restore your Mac from a Time Machine backup using Recovery Mode, follow these steps..
- Restart your Mac
- Immediately press and hold Command + R
- Keep holding until you see the Apple logo or a spinning globe
- When the Utilities window appears, choose Restore from Time Machine Backup
- Click Continue
- Select the backup made before the issues started
- Confirm and begin the restoration
This process replaces your current system with the selected backup.
Note
Any files created after the backup you’re restoring from will be overwritten. If there’s anything important that you don’t want to lose, copy it to an external drive before starting the restore.
How to Start Up Your Mac from Time Machine
Maybe you don’t want to completely restore your Mac yet, perhaps you just want to test, access files, or troubleshoot without changing your current system. In this case, macOS allows you to start from a Time Machine backup.
Here’s how..
- Restart your Mac
- Hold down the Option (Alt) key while it starts up
- When the Startup Manager appears, choose EFI Boot
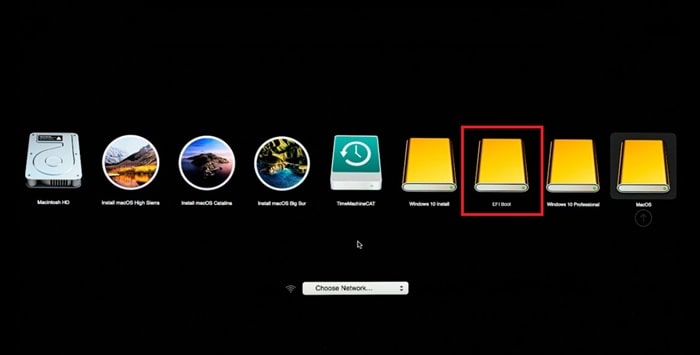
This lets you boot from the Time Machine backup without committing to a full restore. It’s a useful option when you want flexibility or need to check something quickly.
How to Inherit a Time Machine Backup (or Choose Not To)
When connecting a Time Machine drive from an old Mac to a new one, macOS will ask how you want to handle the backup history. Choosing Inherit Backup means the new Mac will take over the backup history from the old Mac.
This option makes sense if..
- The old Mac is being replaced permanently
- You want the new Mac to continue the same backup timeline
Just keep in mind, once the backup is inherited, it can no longer be used by the old Mac.
If you plan to keep using both Macs, select Create New Backup instead. This preserves the old backup history and starts fresh backups for the new Mac, avoiding conflicts and confusion.
A Note on APFS and macOS Big Sur
Starting with macOS Big Sur, Apple switched the Time Machine backup format to APFS instead of HFS+. While this brings improved performance and reliability, it also brings limitations.
If your Time Machine backup uses APFS, it cannot be restored to a Mac running an older version of macOS. Ensure the target Mac supports Big Sur or later before attempting a restore.
How to Recover a File from a Time Machine Backup
Not every data issue requires a full system restore. Maybe a file was accidentally deleted, or maybe a document was edited too far and now it doesn’t make sense. Or maybe you overwrote something important without realizing it—well, I’ve been there too.
The good news is that Time Machine makes it incredibly easy to restore a single file. You don’t have to restore your entire Mac or undo everything else you’ve been working on; you can simply retrieve an older version of the file.
Even better, depending on the application you’re using, you might not even need to connect your external Time Machine drive. macOS often automatically saves local backups, which can be incredibly helpful.
If you have a Time Machine backup available, restoring a file is incredibly easy and shouldn’t take much time.
Here’s how to do it..
- Open Time Machine
- Click the Time Machine icon in the menu bar and choose Enter Time Machine, or
- Press Command + Space, type “Time Machine”, and open it, or
- Click the Time Machine icon if it’s in your Dock
- Navigate to the file you want
Once Time Machine opens, you’ll see a visual timeline of your files. Use the up and down arrows or the timeline on the side of the screen to go back through earlier versions until you find the moment when the file still looked right. - Preview before restoring
When you locate the file, press the Space Bar to preview it. This step is important—it lets you confirm that this really is the version you want before restoring anything. - Download a snapshot if needed
You may see a cloud icon next to certain files. Clicking it downloads a snapshot so you can view that version even when the external backup drive isn’t connected later.
This is useful if you want to review or compare versions. - Restore or copy selectively
- Click Restore to bring the old version back to its original location, or
- If you don’t want to overwrite the current version, open both and copy-paste only the parts you need
How to Access Old Versions of Files Without Time Machine
What if the Time Machine drive isn’t installed? Or maybe you never set it up in the first place. Surprisingly, you may still be able to recover older versions of files—especially if you use Apple’s built-in apps.
MacOS and many Apple apps automatically save version history, even without a full Time Machine backup. If you use Pages, Numbers, or Keynote, file version saving is built in.
Here’s how to access it..
- Open the document in Pages
- Click File in the menu bar
- Select Revert To…
- Choose Browse All Versions
- Scroll through earlier versions of the document
- Click Restore, or copy only the parts you want
In many cases, macOS keeps versions from weeks or even months ago. This is especially useful if you’re late in realizing that something important has been deleted or changed.
Recovering Files from Non-Apple Apps Without the Backup Drive
Third-party apps don’t always manage versions the same way Apple’s app does. However, if you regularly use Time Machine, you might still be in luck.
Even when your external drive isn’t connected, macOS can store local Time Machine snapshots. These snapshots allow you to restore files from the last backup session stored on your Mac.
- Open Time Machine while the backup drive is disconnected
- If snapshots are available, you’ll see previous versions of your system
- Navigate to the file you need and restore it as usual
Conclusion
Time Machine is a powerful tool for quickly fixing small errors. Whether you need to recover a single deleted file, undo a mistaken edit, or retrieve content from a previous version of a document, Time Machine is the solution.
With file-level recovery, local snapshots, and built-in version history in macOS apps, recovering lost work doesn’t mean starting from scratch. Because with Time Machine, you can handle file recovery quickly and efficiently.