In the ever-evolving world of business, efficient management of resources is paramount. Warehouse management stands as a cornerstone in this process, and technology plays a pivotal role in streamlining operations.
This article delves into the advantages and insights offered by the warehouse management system project in Django, shedding light on how this innovative solution can optimize your business logistics.
Understanding Warehouse Management Systems
The Role of Warehouse Management Systems (WMS)
Warehouse Management Systems (WMS) are software applications designed to facilitate the tracking, management, and optimization of warehouse operations. They provide real-time visibility into inventory levels, order processing, and shipping, enhancing overall efficiency.
The Power of Django Framework
Django, a high-level Python web framework, boasts a reputation for its versatility and speed. Its inherent scalability and security make it a perfect candidate for developing robust warehouse management solutions.
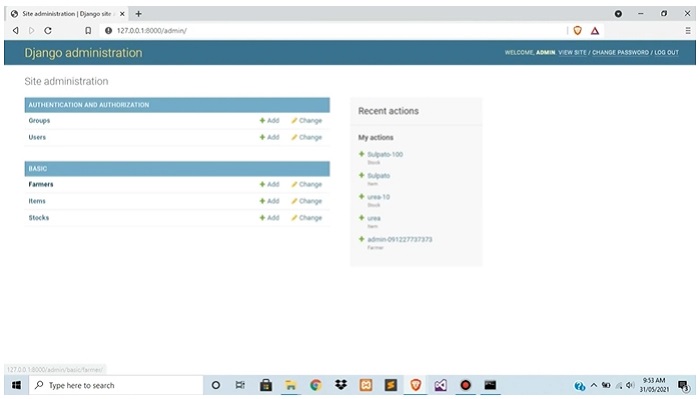
Admin Features: A Comprehensive Overview
1. Login Page: Gateway to Administrative Control
The login page serves as the initial point of entry for system administrators. Here, administrators input their credentials to gain access to the administrative side of the system. This secure gateway ensures that only authorized personnel can access and manage critical system functions.
2. Managing Farmers: Information at Your Fingertips
The Manage Farmers page provides administrators with the tools to add, update, view, and delete farmers’ information. This feature streamlines the process of maintaining an accurate and up-to-date database of farmers, facilitating efficient communication and engagement with this crucial user base.
3. Managing Stocks: Keeping Inventory Up-to-Date
The Manage Stocks page empowers administrators to keep the inventory information current and accurate. Through this feature, administrators can easily update stock levels, ensuring that the system reflects the real-time availability of resources.
4. Items Management: Complete Control Over Items
The Items Management page offers administrators comprehensive control over items within the system. This includes the ability to add new items, update existing ones, view item details, and delete items if necessary. Such control enhances the system’s adaptability to changing needs and offerings.
5. New User Page: Streamlined Creation of Admin Credentials
Within the system’s hierarchy, administrators hold the responsibility of creating new administrative accounts. The New User Page facilitates this process by allowing administrators to generate and set up credentials for new admin users. This functionality ensures that the administrative team can efficiently expand while maintaining security protocols.
6. Users List: Organized Management of Added Users
The Users List feature provides administrators with an organized view of all added users. From this page, administrators can manage user accounts, view their roles, and perform necessary actions such as enabling or disabling accounts. This central hub simplifies user administration and ensures the integrity of the system’s user base.
Utilizing Administrator Features: A Seamless Experience
1. Efficient Oversight and Management
With access to these administrator features, overseeing and managing the system becomes a streamlined process. Administrators can navigate through different functions and make crucial decisions with confidence, knowing they have the tools they need at their fingertips.
2. Enhanced User Engagement
The ability to manage farmers and items fosters improved engagement with key stakeholders. Administrators can maintain accurate records, facilitate effective communication, and respond promptly to user needs, ultimately enhancing user satisfaction.
3. Real-Time Inventory Control
Through the Manage Stocks feature, administrators can ensure that the inventory data is up-to-date and reflective of the actual stock levels. This prevents discrepancies and enables efficient resource allocation.
4. User Administration Made Simple
Creating new admin credentials and managing users are simplified processes through dedicated pages. The New User Page and Users List streamline administrative tasks, allowing the team to focus on strategic decisions.
Django Warehouse Management System with Source Code
| About Project | Project Details |
|---|---|
| Project Name | Warehouse Management System Project in Django |
| Python version (Recommended) | 3.8 Version |
| Programming Language Used | Python Django Language |
| IDE Tool (Recommended) | Sublime, Visual Studio, PyCharm |
| Project Type | Web Application |
| Database | SQLite |
| Link Download | download |
How to Run the Warehouse Management System Project in Django
Implementing a Warehouse Management System (WMS) powered by Django can revolutionize your business logistics. This guide takes you through the process of running the WMS project seamlessly, ensuring you harness the full potential of this innovative solution.
Step 1: Unpacking the Project
The first step in this journey involves extracting or unzipping the project file. Make sure you have the project file at your disposal, and proceed to unpack it to a location of your choice.
Step 2: Initializing the Project
- Accessing the Project Folder
Navigate into the project folder that you’ve just extracted. This folder holds the heart of the Warehouse Management System project. - Opening the Command Prompt
To execute the necessary commands, open the Command Prompt (cmd) on your system. This command-line interface will serve as your tool for interacting with the Django project. - Installing Django Framework
Before running the web server, you need to install the Django framework. In the Command Prompt, input the following command to install Django:pip install django - Migrating the Database
To set up the necessary database structure, migrate the project’s database schema. In the Command Prompt, type:python manage.py migrate - Launching the Web Server
With the database migration complete, it’s time to launch the Django development server. Enter the following command in the Command Prompt:python manage.py runserver
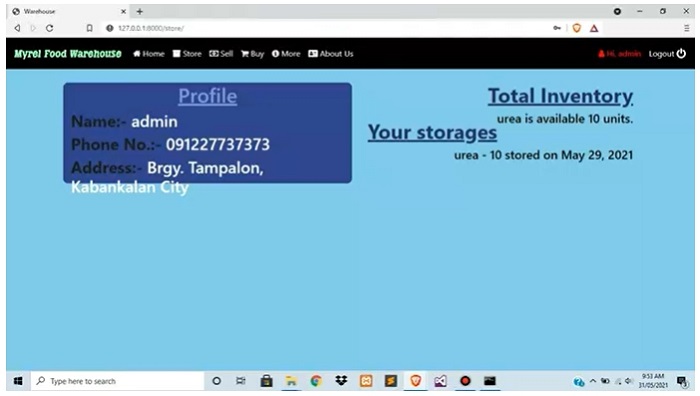
Step 3: Exploring Your Warehouse Management System
- Opening Your Browser
Launch your preferred web browser. The Warehouse Management System project is now running on a local server. - Accessing the System
In the browser’s address bar, input the following URL:http://127.0.0.1:8000/
This URL directs you to the locally hosted instance of the Warehouse Management System.
Conclusion
Warehouse Management System project is a game-changer for businesses seeking to optimize their logistics operations. With its user-friendly interface, robust features, and scalability, it empowers businesses to make data-driven decisions, enhance collaboration, and streamline processes. Embrace the future of warehouse management by harnessing the power of Django.